Use the Board View
The Board View draws a picture of your real MicroPython board and lights up the pins your code uses. It is a fun way to see your program come to life before you even wire anything up.
What is a pin?
A pin is one of the little metal connection points on your board. Your code turns pins on and off to blink lights, read sensors, and drive motors.
Open the Board View
- Open or write a MicroPython file that uses some pins.
- Open the Board View from Snakie's activity bar (the strip of icons down the side).
- Snakie reads your code and draws the matching board, with the pins you use highlighted.
Snakie already knows lots of boards, like the Raspberry Pi Pico 2 W, ESP32, and several Pimoroni boards. See the full list on the Supported boards page.
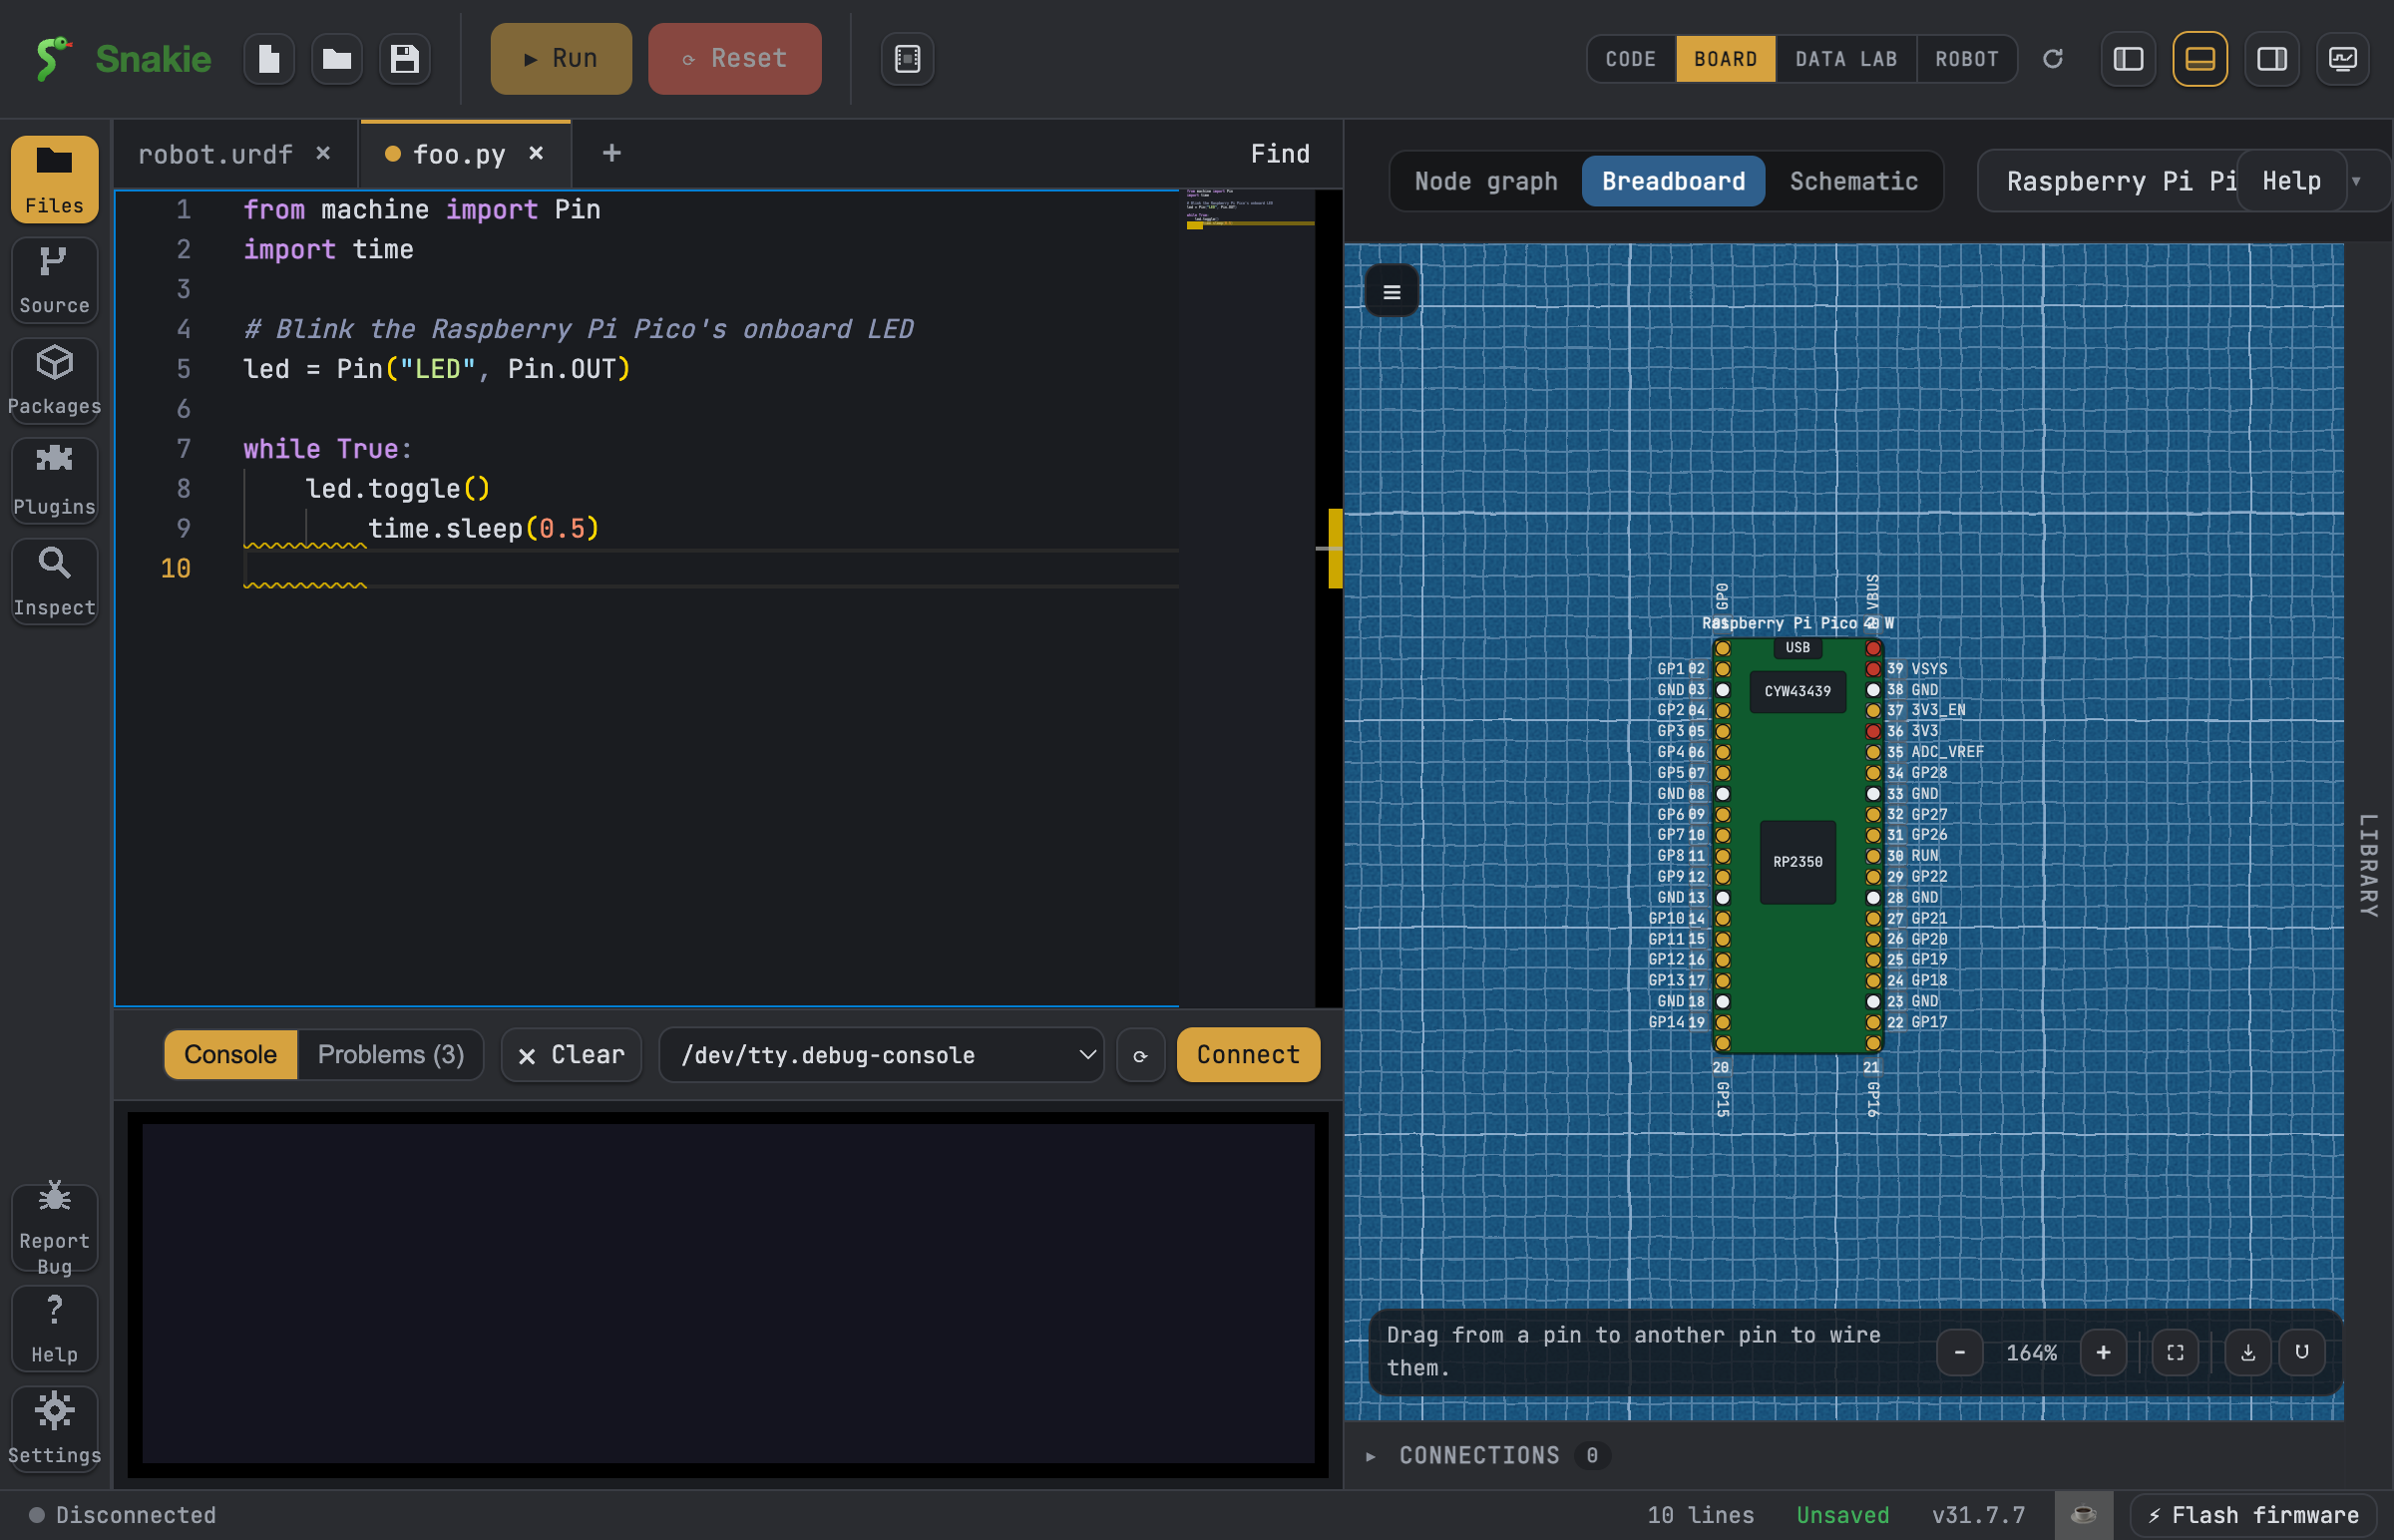
Here is a tiny program to try. It blinks the onboard LED:
from machine import Pin
import time

led = Pin("LED", Pin.OUT)

while True:
    led.toggle()
    time.sleep(0.5)
Tip
Curious how Snakie knows which pins you use? It scans your code for pin numbers and names. Read How the Board View reads your code to learn more.
See connections in the node graph
The node graph shows every connection as a card joined by a line. Each connection is colour-coded by type, so you can tell them apart at a glance:
| Type | What it means |
|---|---|
| Input | The pin reads a value in (like a button) |
| Output | The pin sends a value out (like an LED) |
| PWM | A pin that dims or fades, or drives motors |
| ADC | Reads a smooth, changing value (like a dial) |
| I2C / SPI | Ways to talk to sensors and screens |
| PIO | Special fast pin control on some boards |
When your board is connected and running, the graph can show live pin values too.
Zoom, rotate, and export
You can move around the drawing and save it to share:
- Zoom in and out to see fine detail or the whole board.
- Rotate the board so it matches how it sits on your desk.
- Export a picture as SVG, PNG, or PDF to pop into a report, a blog post, or your homework.
📸 Screenshot
Show: the export menu with SVG, PNG, and PDF options.
Switch between views
The Board View can show your project in three ways. Pick the one that helps you most:
- Node graph — a clean map of pins and connections by type.
- Breadboard — parts and your board laid out like a real breadboard, with wire "noodles" between them.
- Schematic — a tidy diagram with neat, straight lines (red for power, white for ground, colours for signals).
To add parts and draw the wires in the Breadboard and Schematic views, see Add and wire parts.
Make a custom board
Using a board Snakie doesn't know yet? Open the Board Creator to design your own. You place the pins and give them names, and your new board becomes available in the Board View just like the built-in ones.
Tip
Take your time naming pins clearly. Good names make the node graph much easier to read later.
Where to go next
- How the Board View reads your code — the story behind the highlights.
- Add and wire parts — build a full circuit on screen.
- Supported boards — check your board is in the list.
- Watch the Board, Breadboard and Schematic views in Kev's Snakie tour — see the visual workflow demonstrated on real hardware.